It wouldn’t feel like a proper entry in the series if Call of Duty: Black Ops 6 didn’t present a fun single-player campaign alongside the compelling grind to Prestige. Not only is the narrative exciting, but the missions vary quite a lot and give you plenty of options for how to accomplish objectives. There are a lot of things you might miss on a first play through, though, including a set of safes littered throughout the campaign.
Nearly every mission has one and each has $1000 that you can use for upgrading campaign-specific perks at your base or for unlocking exclusive weapon skins. Compared to how much you usually get from a mission, the extra cash is certainly worth it. Whether you want an extra edge in the campaign or just can’t get past the related puzzles inside the base, we’ve got you covered with a breakdown for each safe.
How to Open Safes in Black Ops 6
Each campaign safe has two vital aspects: the location of the safe itself and a radio that can transmit the code to open the former. You’re likely to find the radio first, as a message will pop up in the middle of the screen to inform you when there’s a signal nearby.
Interacting with the radio will start a frequency-tuning minigame. You’ll need to use the sticks on your controller to modify one frequency wavelength to match another. Successfully doing this will cause the radio to start repeating the four-digit code needed to open that mission’s safe.
It is worth pointing out that these codes are random. That means no skipping a step and aiming straight for the prize – you need to find the code first. Fortunately, the safes and radios are near each other, and typically they’ll even be in the same room. We’ll be providing the locations for both.
How to Open the Safehouse Safe
Opening every campaign safe isn’t too difficult, as a majority just require you to find their location. The biggest outlier to this is the one inside The Rook safehouse. Although you can find the safe easily enough on the second floor, the code is hidden behind six puzzles. These can be tackled whenever you’re at The Rook between missions, so feel free to unlock this safe first or last.
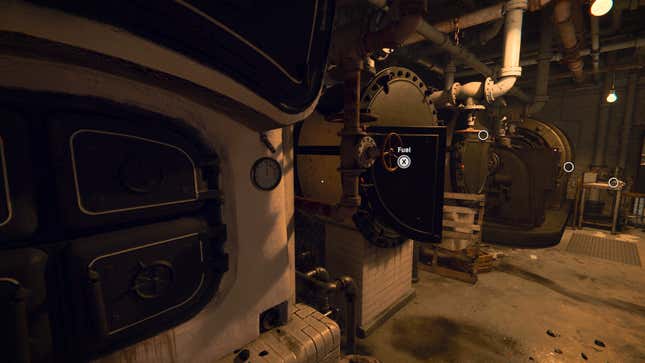
The first puzzle to solve involves the generator inside the Boiler Room. When facing the central area that the Evidence Board is in, look a little to your right to see a thin hallway. Immediately on the hallway’s right side will be a door leading downstairs to a basement and an attached boiler room. You can adjust the generator using the Fuel valve, a Boiler valve, and a Pilot dial. Here are the steps to take:
- Turn the Boiler valve twice.
- Turn the Fuel valve once.
- Turn the Pilot dial once.
- Turn the Boiler valve twice again.
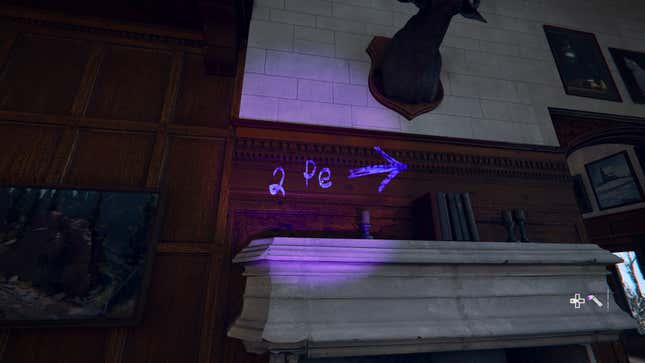
This will unlock a door, but we’ll get to that once the Piano puzzle is solved. Go back upstairs and head into the room on the other side of the central area. Pick up the Blacklight that’s pointing toward the piano. You’ll be able to use this in the safehouse by pressing left on the D-pad as well as during puzzles by pressing X for Xbox or Square for PlayStation.
Look around the room with the blacklight to find five different notations with numbers next to them. Interact with the piano and toggle the blacklight to find a series of notations above the keys. The following keys need to be played in order:
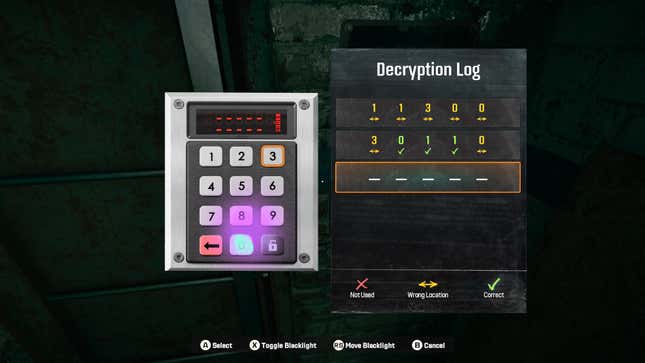
Some of the wood paneling next to the piano will swing open, revealing the entrance to a secret bunker. Remember that generator you turned on earlier? It unlocked the door at the bottom of these stairs. Go through it, walk down the hallway, and then take your first right to find a door with a keypad. This will start a common puzzle that can be found in the campaign. The code is random each time, so you will need to solve this.
Interact with the keypad and use the blacklight to see which buttons were used the most. Those with a bright fingerprint on them are part of the code, while any with multiple fingerprints means that it shows up more than once. You’ll be able to tell if the number is correct, in the wrong location, or not used at all.
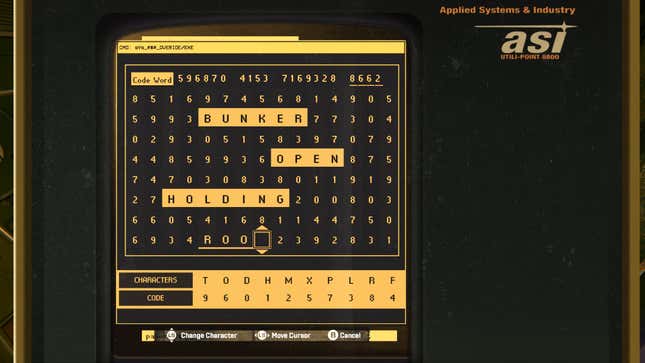
Go through the unlocked door and then circle around the room until you find a computer. Interact with it to start a cipher puzzle, another recurring one throughout the campaign. All you need to do is use the cipher at the bottom to sort out the correct letters. The order will be random, but they’ll always be the following four words:
With this solved, exit out of the room and take a right down the hallway. The door on the left side will be open just ajar. Walk through it and then go to the door straight across to start a simple lockpicking minigame. Slowly rotate the lock pick with the right stick until each pin is lifted. Walk inside the torture room and grab the key on the small table.
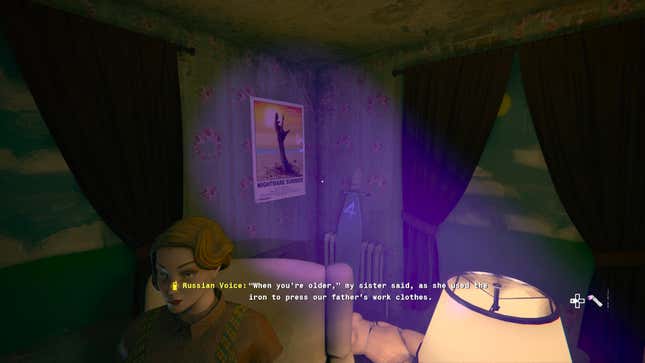
Head back towards the hallway with the keypad door, but turn right to go across from it. Open the sole door on the left to discover the final puzzle, which involves tuning the frequency of a radio. Instead of directly revealing the safe code numbers as it does for all other safes, it will start repeating a random set of phrases.
I highly suggest writing down what the radio says. Specific keywords in these phrases relate to objects around the room. Turning on the blacklight and scanning the room will reveal various numbers next to the objects. It’s completely random which phrases you’ll hear and numbers can be associated with multiple things.
Once you have a decent idea for what the code could be (or at least know three of them so you can brute force the last one), go back to the first floor. Leave the piano room, walk past the main area, and enter the room with the front door. Walk up the stairs to the second floor and make two lefts.
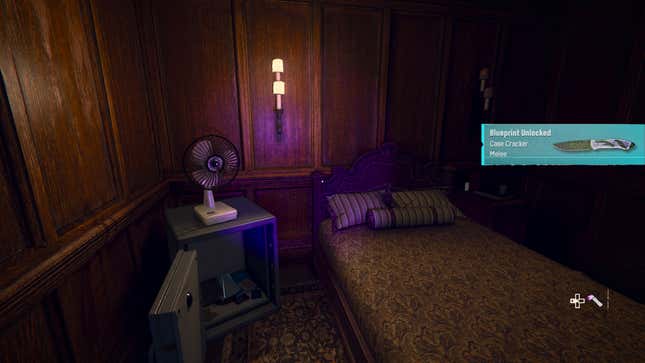
Open the door to Adler’s bedroom and then turn left to find the safe. Enter the right code to open what is easily the most difficult safe in the campaign. In addition to the standard $1000, you’ll also unlock “The Puzzles, Mason” achievement and the Case Cracker melee weapon blueprint. The latter is a bit flashy, but who doesn’t want every operator they unlock to have some bling?
Where to find Blood Feud Safe
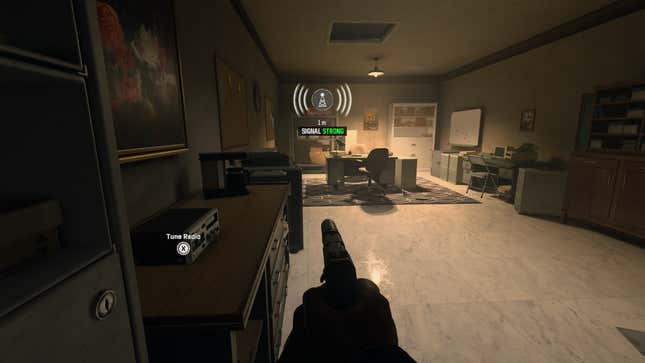
The first proper mission campaign safe is in Blood Feud. It will take a bit of time to reach it, as it’s available in the second half when you visit Chateau de la Haute Lune. There are a few options for how to enter, but to find this safe quickly I recommend going to the left side of the building. You’ll see a stack of boxes and a white van that are just right for jumping on. Above them will be a ledge you can climb over and a ventilation shaft leading inside.
Crawl through the vents and then take a right. Keep going until you find yourself above a room with two guards talking. Remove the grate and take them out, preferably without making a lot of noise. Drop down and look toward the sole door in the room to find the radio. The safe is meanwhile right next to the center desk and beneath a whiteboard.
Where to find Most Wanted Safe
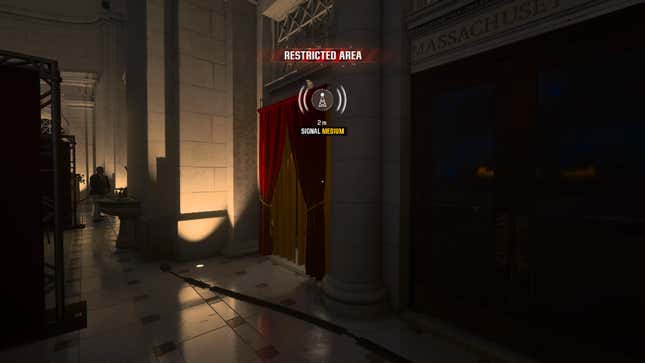
It won’t take very long to find the safe in Most Wanted. After talking with a few people, you’ll have free rein to explore the party. Head to the east side of the building with the dance floor and bar. If you’ve already talked to Sev and learned your three possible objectives, it’s where the Covert Affair objective is.
What we’re looking for is right behind the bar, so I recommend finding the opening on the right side and waiting for the patrolling guard to walk away. Stay a safe distance behind him and then sneak through the first set of curtains you see.
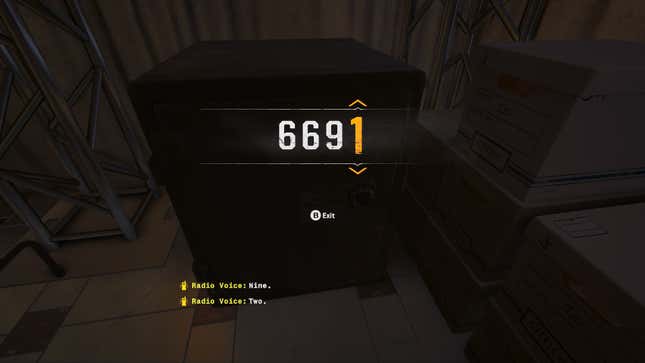
Push past the room and through another set of curtains. Inside this small makeshift room will be the radio immediately to your right and the safe in the back left corner. Tune the radio to find the code and then use it on the safe to become $1000 richer.
Where to find Hunting Season Safe
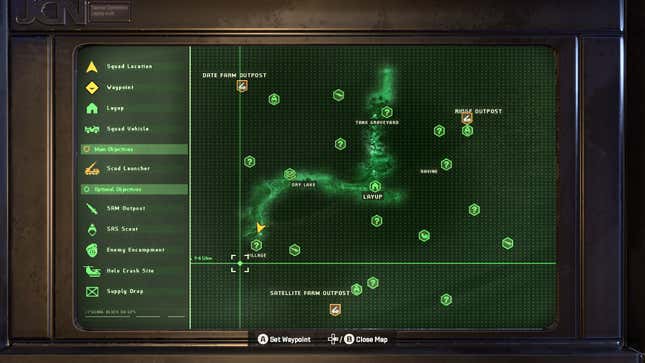
If there’s any safe that you’re bound to miss, it’s probably this one. The Hunting Season mission takes place on a huge map that necessitates vehicles and even a fast travel system. Even though you only have three main objectives, there are multiple other points of interest to discover.
After setting up base in the middle of the map, drive a vehicle West and then South across the Dry Lake area. Your destination will be what’s simply called the Village, which is closest to the Southwest corner. I encourage you to mark as many enemies as you can with the binoculars. There are quite a lot in this area, and it might be easier for you to take them out from a distance.
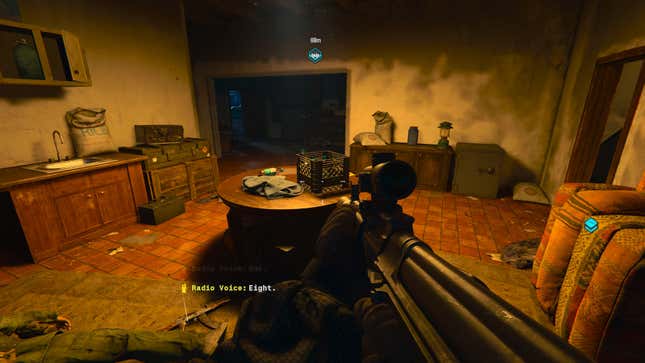
Try to focus on the annoying rocket launcher enemies as you pick them off. Once you’ve whittled down their numbers enough, run through the village and clear them all out. It’s best to have a safe area before looking for the safe.
Speaking of, you can find what you’re looking for in the giant building in the middle of the village. The safe can be found inside the kitchen on the second floor. It’s next to a dresser with a lantern and bags of rice on it. The radio is just around the corner from it in a tiny and dark room.
Where to find The Cradle Safe
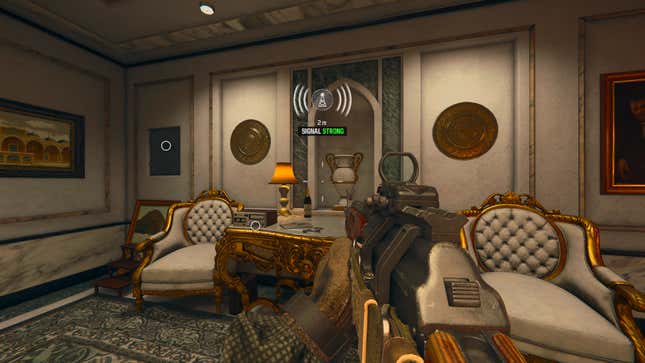
The Cradle has you finally storm the palace that was mentioned in the previous mission. This mission drops you off in front of the lavish palace as you push your way through enemy forces. It’s a much more intense situation than the previous one, but you can safely ignore your companions to do some quick exploring.
Shoot your way towards the entrance and then veer off into the left building. The safe and radio can be found just up the stairs, but feel free to pick off all the nearby enemies first and push up a tiny bit more. You’ll have some guaranteed peace once Marshall says they’re “falling back into the palace” and the enemies start running away. Go upstairs to find the radio sitting on a table and a wall safe practically right next to it.
Where to find Emergence Safe
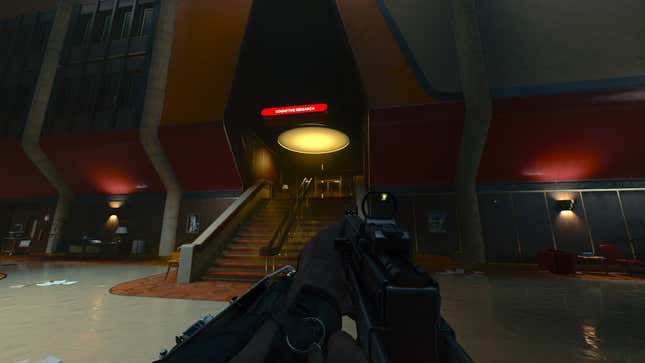
Emergence is a stand-out mission that’s very weird and keeps you on your toes. More importantly, the safe is tucked away on this open map and easy to miss. The good news is that you’ll be able to find it pretty early on.
Your main objectives will be to find four colored keycards to make your escape. These and the facility wings they’re in are all color-coded. The first place to visit will be the Advanced Combat Research wing to get a Yellow keycard and a grappling hook. You’re free to visit the other areas in whichever order you want, but we’ll want to snoop around the Red Cognitive Research wing.
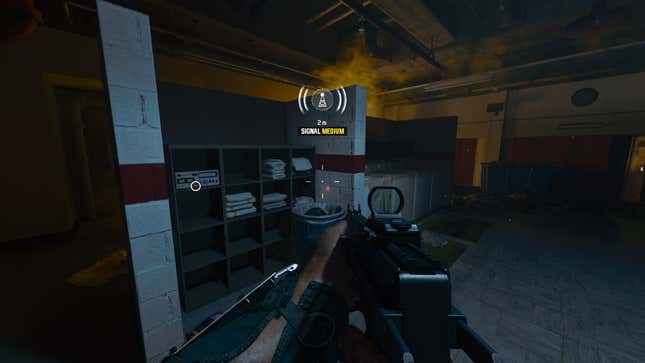
Walk down the initial hallway of Cognitive Research and you’ll come across a FUTZ-branded soda machine that’s definitely not Pepsi. Head to the right and down the hallway with an ominous red eye staring at you. Enter the locker room and immediately turn left to find the safe next to some hanged clothes. Then keep walking towards the back of the room until you’re near the washing machines. The radio will be on a shelf in the corner.
Where to find High Rollers Safe
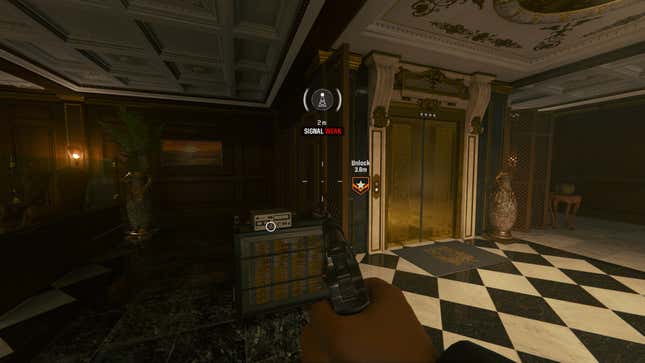
High Rollers is a fun mission that has you switching between multiple team members to enact an Ocean’s Eleven-like heist. Your opportunity to find the safe won’t come until later on, but thankfully it’s nearly impossible to miss.
After playing as Marshall and Felix, Sev will be the next one you take control of. Your first objective will be to sneak your way through a restricted area and activate an elevator for the others to take. Silenced pistols that can be found on tables near the entrance stairs will make it easier to clear the room.
Head towards the elevator when you’re all alone and you’ll find the radio just to its left. Tune the frequency for the code and then walk just around the right corner of the elevator to find the safe.
Where to find Ground Control Safe
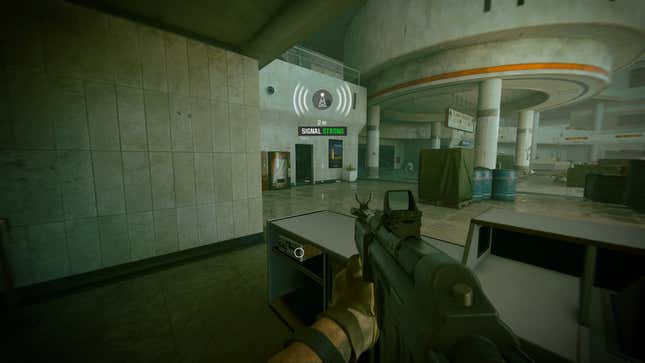
Just like The Cradle, the Ground Control mission has you fighting an onslaught of enemy forces. You’ll have to push your way through an airport in the middle of a war zone. The safe and radio will be just a little off the beaten path.
After dealing with enemies outside the airport, the next big shootout will be inside a terminal. Once you’ve cleared them all out, walk past the gate Adler and Sims head to and approach the Information desk. The radio will be found behind this large desk on the right side. Tune the frequency and then keep note of the code – the safe is just far away enough that you won’t be able to hear the repeating numbers.
Look up from the desk and you should see an open room to the left of the gate. It will be near a pair of soda and coffee machines. Walk into that room and a wall safe will be waiting for you on the far end.
Where to find Under the Radar Safe
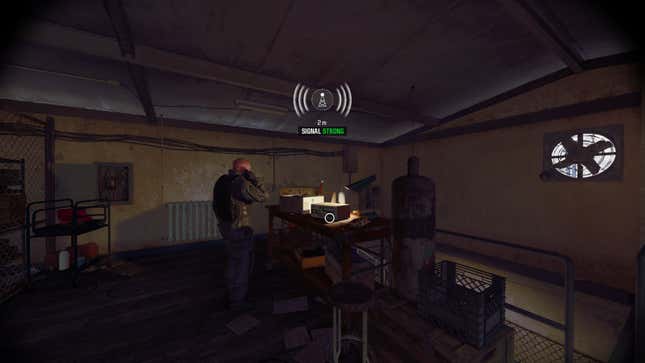
The final campaign safe to be found is in Under the Radar. Not only is this an open mission that lets you tackle the objectives however you want, but it also lets you access the safe almost immediately.
Our last little secret can be found near the Radar Dish objective. Enter the building with the dish and head upstairs. The radio will be on a work bench next to a soldier talking into an earpiece. Directly behind him will be a chain link fence and a locked door that leads to two more soldiers in a corner. Pick the lock and turn right to find the last safe.
With the right amount of finesse, you should be able to tune the radio and open the safe without alerting any of the soldiers. If you don’t want to leave things up to chance, a silent takedown or two with a side of throwing knives will do the trick.
Read More: Black Ops 6 Adds Excellent Perks To The Single-Player Campaign
Using that extra money to upgrade perks will help when taking on the campaign’s tougher challenges. Some of them can really make a big difference. If the campaign doesn’t feel too difficult for you, using the cash to unlock weapon skins for use in both Call of Duty: Black Ops 6 and Call of Duty: Warzone multiplayer works too. I’m awful in multiplayer, but running around and getting kills with a glowing purple shotgun skin called The Bastion does feel pretty cool.
.


